Written by Alex Darc
Many people think that growing potatoes in your Square Foot Garden isn’t possible, but if you choose the right varieties you can have a successful potato crop. Mel made some great videos on how to grow potatoes in pots and grow bags, but we’re going to talk about how to grow them right in your SFG plot.
Sourcing
 The most important part of growing potatoes is starting with certified disease free seed potatoes from a reputable source. Can you plant potatoes from your grocery store? Yes, you can, but grocery store potatoes are not tested for soil borne diseases, like Early or Late Blight, or Scab or Black Scurf, and could infect your Mel’s Mix with diseases that will affect your nightshade crops for years. In addition you will likely have no idea what variety the potatoes are, when to expect to harvest them, or whether they are determinate or indeterminate, and when it comes to planting in SFGs, this is very important.
Indeterminate vs Determinate?
What is the difference?
Indeterminate potatoes are also called Late Season potatoes and they will continue to grow for most of the season often until frost and the plants will get very large and if you mound them up with soil or mulch, they can grow potatoes all the way up the stalk.
Determinate varieties are sold as Early Season Potatoes (55-70 days) and Mid Season potatoes (70-90 days). These plants have a more restricted growth and will begin to die back when it is time to harvest. These plants will not grow as tall as the indeterminate potatoes and when they start to flower they do not need to be mounded any higher. And that is what makes them perfect for SFG or planting in 3-5 gallon grow bags or pots.
Preparing to Plant
 The next part is all about timing. Plan to plant your potatoes out 2-4 weeks before your last frost. 4 weeks before that, plan to start greensprouting (also called chitting) your potatoes.
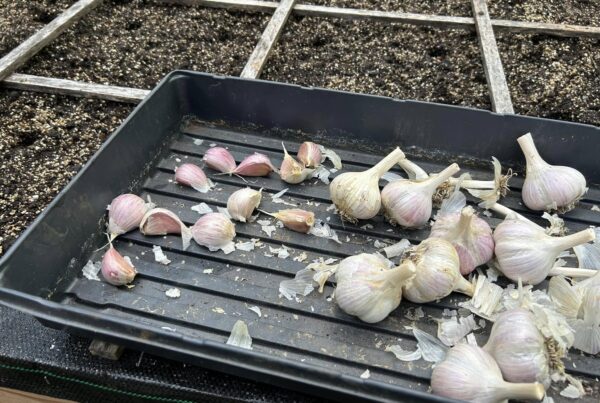
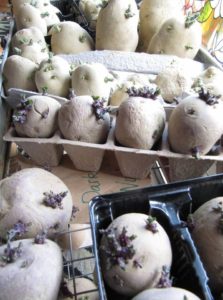
To do that, place the potatoes rose end up in egg cartons located near a window. The rose end is the end with the most eyes. The warmth will help them break dormancy and the light will make the sprouts nice and green and keep them short. Many people sprout their potatoes in the dark, so the sprouts get really long and white, but that is not the best choice for the best harvest.
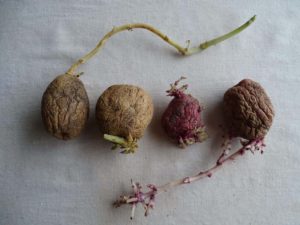 Shorter, greener sprouts are stronger and provide more food to the plant even while they are trying to break to the surface of the soil. The goal in greensprouting is short dark green leafy sprouts, not spindly, leggy sprouts.
If your potatoes are larger than the size of a chicken egg, you may want to cut them up into smaller pieces. This will give you more pieces to plant and can be a frugal way to extend your planting area. Try to divide them into pieces no smaller than an egg with no less than three sprouts per piece. Do this at least a week before planting so that the cuts have time to heal. They should be well healed and dry before planting.
Planting
Before planting, make sure your bed is well drained and the soil temp is at least 45˚. In SFG you can choose to plant 1 potato, 2 potatoes or 4 in a square foot. The more you plant in a square the smaller your harvested potatoes will likely be. Planting 4 to a square is a good method for getting “new potatoes” or baby potatoes. If you are hoping for large storage/baking potatoes, plant 1 or 2 to a square.
In your square, make a deep hole (or 2 or 4 depending) and place your potato sprouts side up as close to the bottom of the box as you can. Then cover with an inch or two Mel’s Mix.
Tending
Once a week, cover the sprouts again with Mel’s Mix you had removed from the hole. Do this until the soil is nearly level. At this stage you can either add a “top hat”, a bottomless box to hold added soil to your square( you can purchase one here https://www.sfgrrv.com/product-page/top-hat-box-for-carrots-leeks-potatoes) and keep adding Mel’s Mix or good light mulch , or just pile the mulch on top like a mound. I use straw or salt marsh hay or even chemical free dried grass clippings to cover the plants once more to keep any tubers forming close to the surface from being exposed to sunlight.
Potatoes need 1-2 inches of water a week, and water is critical when they are first planted and when they are flowering. Once tops begin to die back, reduce watering before harvest. Check your plants regularly for potato beetle larvae on the backs of the leaves and any signs of disease. Snip off any flowers to make sure all the energy goes into tuber production, not flower/seed production.
Harvesting
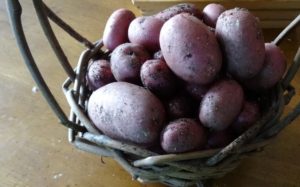
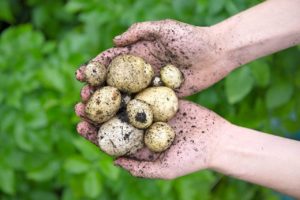 After the appropriate days to maturity for your variety, you can begin harvesting. Mel’s Mix makes potato harvesting easy, because it is light and easy to dig. Remove any mulch you applied and dig with a hand spade so as not to damage any of your potatoes. Try not to disturb the roots of any other plants you have planted in the bed.
When harvesting potatoes that you plan to store long term, you don’t wash them. You can dust the soil off them, but don’t wet or wash them, keeping them dry and a bit dusty will help them keep longer.