Written by Chris McLaughlin
 For seedlings that began life indoors under lights, there comes a time that they will need to leave the coddled, and climate-controlled protection of your home (or greenhouse) into the harsh elements of life outdoors. They will be facing new high temperatures, low temperatures, as well as leaf-nibbling critters. As the person who lovingly reared them to this stage, the last thing you want to do is to toss them out into your Square Foot Garden all willy-nilly.
No, the best way to prepare tender seedlings for their permanent home is to ‘harden them off’ (acclimate) them first, and here’s why. Tiny seedling leaves that are immediately exposed to a full day of sun will have you purchasing more seeds tomorrow. A few sun-burned leaves may be unsightly on a mature plant. But for a baby plant, it’s a death sentence. The unpredictable outdoors can have wild temperature fluctuations which can be disastrous for young starts.
The Gentlest Way to Toughen Them Up
 There’s more than one formula to harden off seedlings, and all gardeners have their own specifics. The hardening off process takes anywhere from 7-10 days. While that sounds like a wide range, it really depends on what is happening in your area and under what circumstances they are being transplanted.
For example, for plants that will be situated in a spot that only sees morning sun, they may only need seven days of acclimations because they will never be in full direct sun anyway. Or, perhaps, you are transplanting them when they are outgrowing 4” sized pots. They may be stronger plants at that point that don’t need as many days. On the other hand, if you’re in the middle of hardening off starts and you have an unexpected drop in temperature, it’s going to be best to give them an extra week to acclimate. You’re going to have to feel your situation out.
Here’s How I Do It
-
Allow your seedlings to harden off or acclimate outside for 2-3 hours per day to begin.
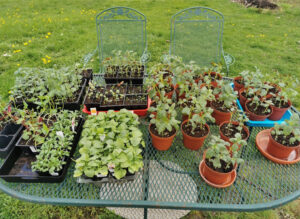
The little guys are brought outside to sit under a covered area for 2-3 hours. Remember, this is a protected spot that is not in the sun. I prefer to let my seedlings get a feel for the change in temperature and the breeze before I introduce them to the sun. After 2-3 hours, they are brought back inside.
- I do this shade vacation thing for two days and around day three I place them into the morning sun for one hour. Notice I said the morning sun – not the afternoon sun. Morning sun is much gentler than the afternoon sun, which takes its job seriously. After bathing in the morning sun for one hour, I pull them under the shade again until the early evening. Then I bring them back inside.
Each day, I increase the time that they spend in the sun. After day seven, I let them spend the night outside under the covered porch. The time they spend in the sun becomes longer and longer until we are two weeks into the process. It’s at this point that I am confident that they are ready to take on life in the SFG Bed.
This process may seem like a lot to go through just to get them planted. As I stated above, you may not need that long for some of them. But I can promise you this: you are going to breath fire and utter words you thought would never come from your mouth when you step outside and your precious darlings that you have coddled and nurtured for many (many) weeks have been fried to the ground because you pushed them too fast.
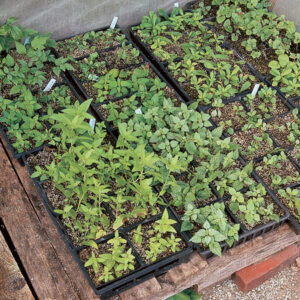
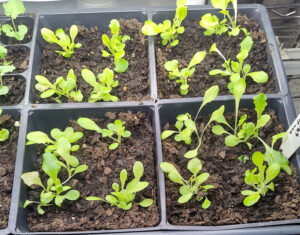
Example of seedlings with ‘true’ leaves.
Tips For Seedling Transplant Success
- Watch for the perfect weather. The ideal weather for transplants looks like gray skies, drizzly, or overcast. If none of this is in the forecast on transplanting day, schedule planting them into your SFG in the early morning so they will deal with the least amount of sun.
- Get them juiced up a couple of days before by giving them a light dose of balanced organic liquid fertilizer (Planet Natural or Dr. Earth are ones I use) to help ward off shock. This is the only time you will need to use fertilizer, since the Mel’s Mix in your SFG provides all the nutrients your plants will need to grow. Always water seedlings well several hours before transplanting.
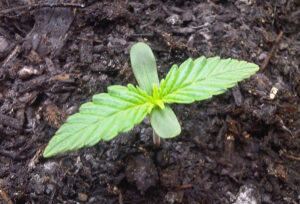
- Look for two sets of ‘true’ leaves. True leaves are the leaves that show up after the very first“leaves” that open after first pushing through the soil fall off (cotyledons). They should be full and healthy-looking seedlings for the best transplant success.
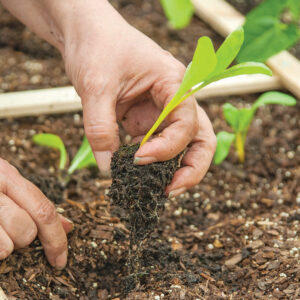 Prepare their new spot in your SFG by digging the planting holes before sliding seedlings out from their original pots. The less time young roots are exposed to sun or wind the less transplant shock they will have.
 - Handle tiny plants with care. While removing seedlings from their containers, be gentle and take care not to bang or smash the roots. Keep as much of the original soil around the roots as possible.
- And last, but certainly not least – make sure your seedlings have enough water, give them a good drink after planting them in your SFG.